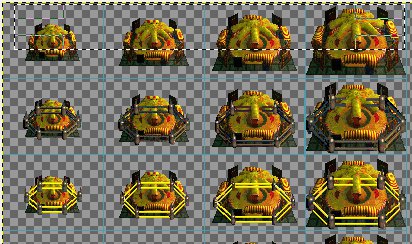
A great blessing of SMACX faction modding is that the game is very forgiving about base placement and perspective; you have to screw up pretty badly to have a base not look right against the landscape. Taking care of all the details for 24 copies of the base can be quite tedious, but here are some shortcuts to make it manageable.
Since BlueFlux inspired me to write this up, I began with opening up
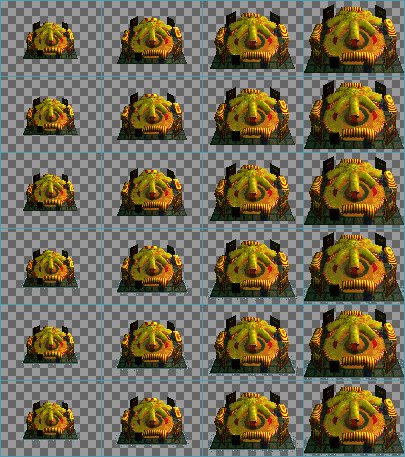
Bases5 and selecting the base he used in his learning faction. Even using bases you created/repurposed yourself, most of the following instructions will apply. -Arranging bases for only one row of the six and copy/pasting the rest will save a lot of time and effort at several stages of this process.
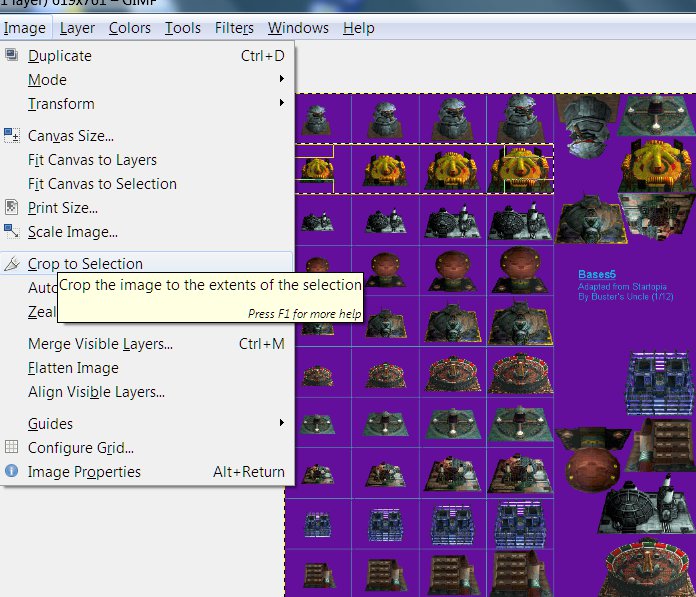
(Skip this cropping step - I just wanted to make the screenshots easier to deal with.)
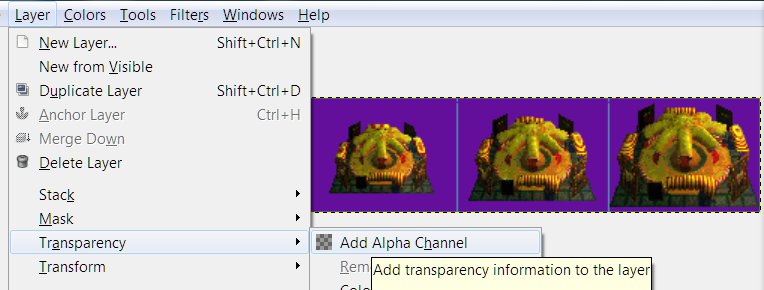
Because GIMP handles the transparent background color badly and this base stuff involves a lot of copy/pasting back and forth, GIMP users (it's free and available to download; just google it) need to work with the background color removed - incidentally, being able to do good transparencies is a useful skill for things like avatars and smilies, too.
So Layers>Transparency>Add Alpha Channel:
Using the Select by Color tool with Threshold set to zero (see red arrows) select the background color
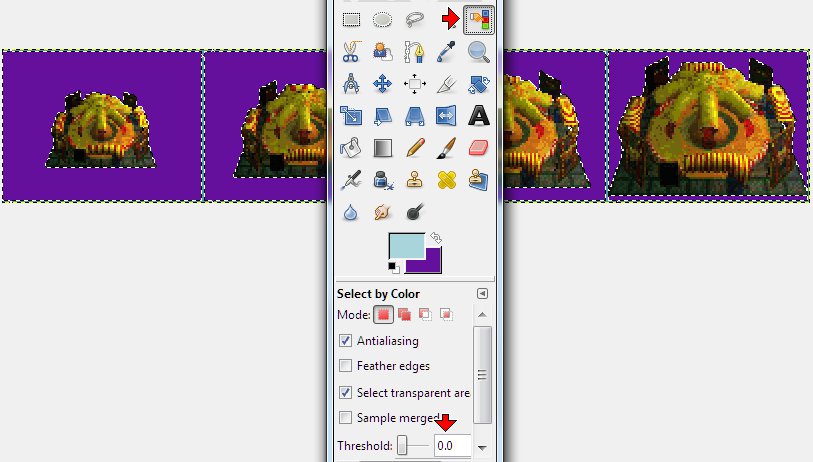
[Delete]

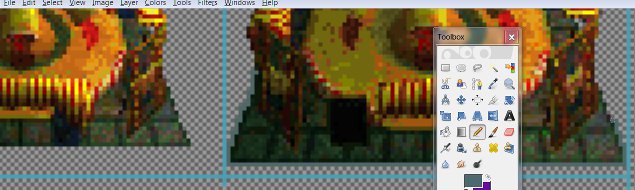
Select the base row>[Ctrl]c to copy.
Load up
Blank faction.pcx

-and make the background transparent.
Select the first row>[Ctrl]v to paste. Repeat three times. It helps to select and paste the light blue lines along with the bases, for ease of alignment. -You now have each size base in
exactly the same spot in the square, which is about to be useful in placing shields - and sea platforms, if you use a separate structure for that.

I started out as a faction creator not knowing any better than to place each base manually
twenty.
four.
times. instead of
only four. This is
definitely a better way.
The base I'm working with is a poor example to demonstrate the sea stuff - it comes with a foundation that doubles nicely as a sea platform and the largest stage takes up most of the available space at the bottom. However, to slightly distinguish it visually, I drew in an outline of dull blue-gray...
And added some sea-foam scatter of similar dull blue-greens with a little white. I put the purple background back temporarily so the argle-bargle would be more visible in the screenshot.
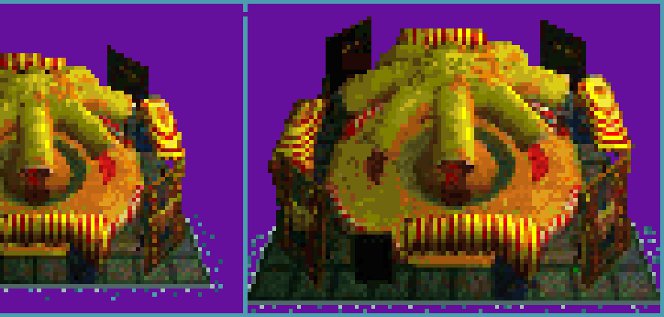
I only had to do that for four bases, the ones in the forth (unshielded sea bases) row, then copy/pasted that row twice more into the next two to complete the set.
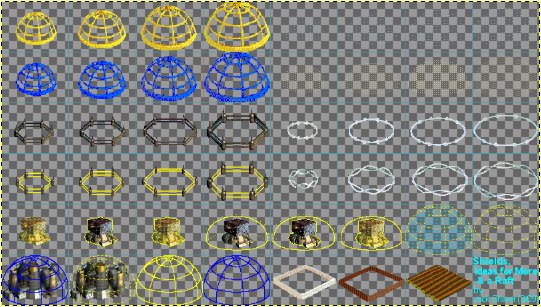
Now for the shields. I loaded my
Bare Shields file and transparencied the background.
There's a constant temptation to use the alien shields - they're better-looking and MUCH easier to work with. But, like many touches new faction modders tend to find optional, like leaderhead scanlines, it's important to maximize compatibility with the official factions if you want your work to be well-received and popular with other fans. What makes SMACX so special, more than anything else, is the storyline, the
personality it projects. A
good custom faction tells a little story, in the names, the appearance and expression of the leader, the faction quotes, and, not least, the look of the bases. You need a
reason for your faction to be using
Progenitor shields if you're serious about what you're doing. Better to invent something new than cop out using Prog shields.
So I selected half the first
human shield. (Bases come in such a variety of sizes and shapes that I didn't even
try to make them one size fits all when I created my bare shields file. A big virtue of the human shields is that all you really need are the posts - it's easy to draw in the rails, if you have to.)
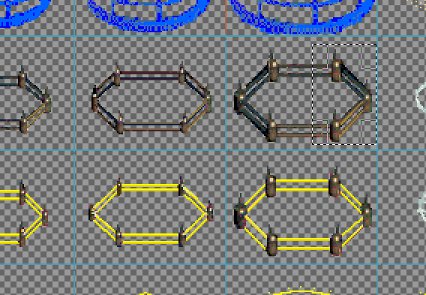
I pasted the half-shield over the stage four base..
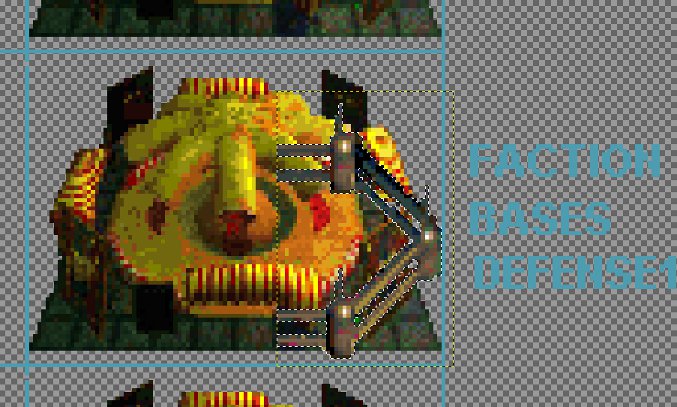
And it was close enough to a fit, as the back half will be completely covered when I'm done. But
if it needed a little more space, I'd go Layer(not Image - that would change the entire graphic - until the paste is deselected, the program treats it as a separate layer)>Scale Layer

Click on the little chain icon the red arrow points at (to uncouple height from width)
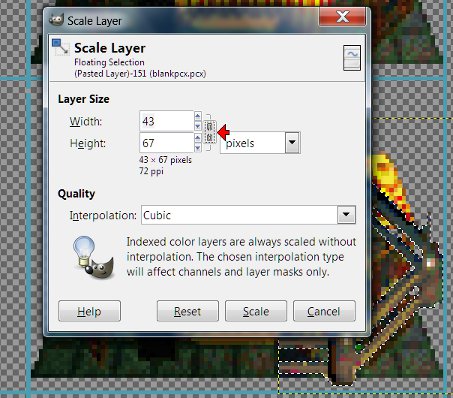
and bump up the height four pixels. This can also serve as the simplest perspective fix; bases/shields/sea platforms should look like they're viewed from a roughly 30-45 degree angle. If the base looks like it's sitting flat on the ground ingame, you've gotten it close enough. Again, the game is very forgiving about that.
So, after drawing in the gap in the rails (in front; the back's getting covered up in a few steps)
I got this.
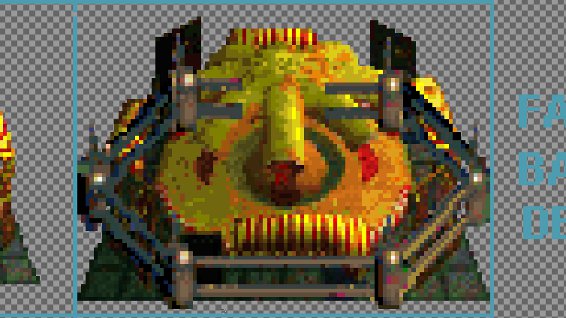
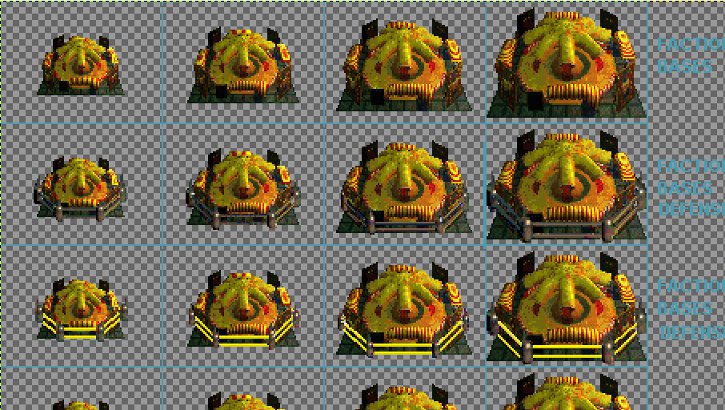
After repeating for the other bases in the row - and repeating the process on the next row with the tachyon shields, I got this:
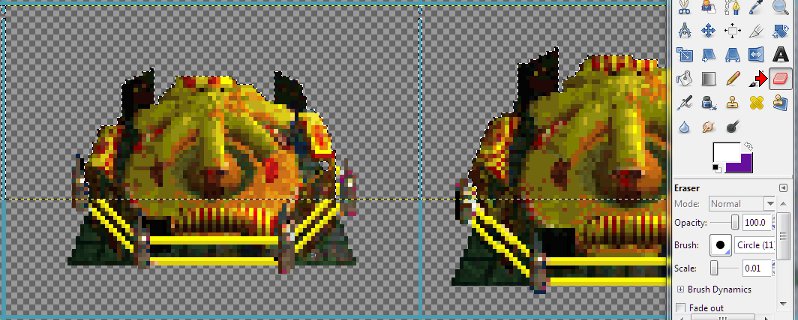
Now for a cute trick I discovered after a couple of years of wasting time when I placed shields, erasing the bits that covered part of the base before I dropped them in -- I select (roughly) the top half of the entire first row (estimating what will cover extra shields below - sometimes the base is narrow, and that's really easy).
It's best to select the entire inside of the upper half of the boxes - the dotted outline helps serve as a placement guide, so you don't have to zoom in as close and match it pixel-by pixel. This is a place having all your rows identical through repeated copy/pasting saves a lot of time and effort - you can do pastes like this an entire row at a time.
Man, did I waste a lot of time/effort for a couple of years as I was first teaching myself how to do this.
So I paste, and use the arrow key to move it down to the next (stage one shields) row.

And repeat with the tachyon field row. If you look close and squint, you'll see that a few pixels of the corners of the paste-in cover bits of the shield - so before deselecting, I use the Eraser Tool (indicated w/red arrow) to delete the extra pixels from the paste. (Takes a little trial-and-error using [Ctrl]z to back up from mistakes, but a useful part of pasting technique, especially with complex shapes. I end up doing that in several other parts of a faction graphic.)
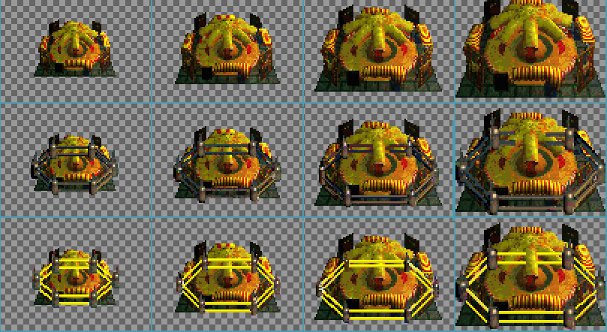
So that gives me the land shield rows finished.
And here's the other place having all your rows identical through repeated copy/pasting saves a lot of time and effort - you only have to drop in each size shield once, not twice, provided your sea bases are the same as the land ones (with sea platforms added underneath or not - you can use the same techniques, BTW, as I've gone into here for adding sea plaforms). I copy pasted the
land shield rows over the sea ones.

So after loading a second copy of Blank faction.pcx, and copy/pasting the lot in...
Here's the finished product, ready to drop into a custom faction:

.pcx copy attached. Feel free.


